This post describe how to read an Atlas Scientific ORP probe and push the values to Domoticz.
Supplies needed:
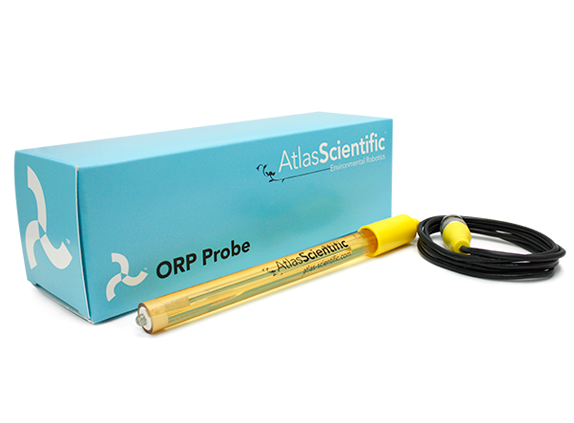
- ORP Probe
- EZO ORP Circuit
- I2C Toggler
- Tentacle T3
- A Raspberry Pi
- Installed with Raspbian and domoticz
Step 1: Set the EZO protocol to I2C
The EZO ORP Circuit support two protocols, UART and I2C. By default the selected protocol is UART. The I2C Toggler is a easy way to change this protocol. It can also be done with jumpers, but be carefull, you can break the chip. To change the protocol use the official manual from the I2C toggler.
Step 2: Install the EZO on the Tentacle T3
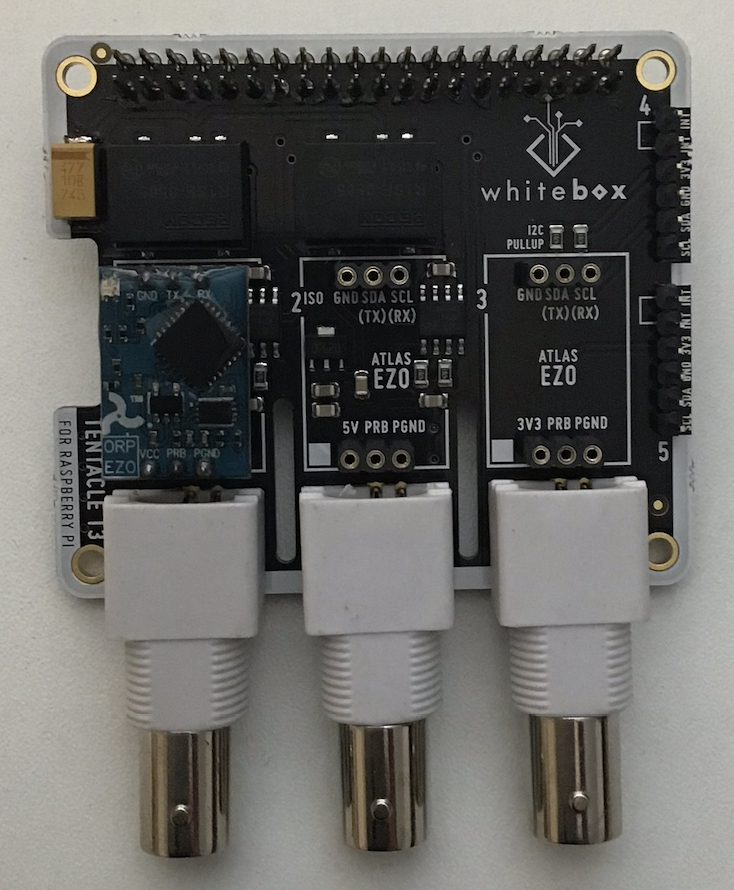
Prepare the Tentacle T3
The TentacleT3 has three connectors. It is good to know that the two on the left are isolated, so they can be used for the ORP or PH sensor. The right connector can be used for a temperature sensor.
Place the EZO chip on the left connector like the image on the right.
Step 3: Prepare the Raspberry Pi
Dont mount the Tentacle T3 to the Raspberry Pi yet
On the Raspberry Pi we need to enable the I2C protocol and install the I2C tools. Goto the terminal of your Raspberry Pi.
sudo raspi-configIn the menu, active I2C. The setting is under 5 Interfacing Options -> P5 I2C.
After enabling I2C reboot the Pi.
sudo reboot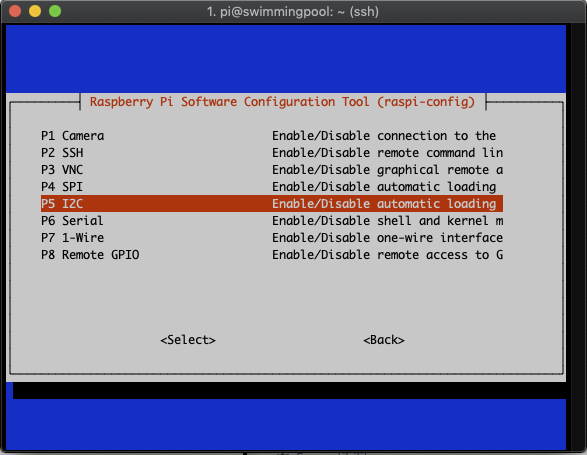
After the reboot install the I2C tools. It is always good to have the system packages up to date, so upgrade the system first.
sudo apt-get update
sudo apt-get upgrade
Install the I2C tools
sudo apt-get install python-smbus
sudo apt-get install i2c-tools
Reboot the Pi (sudo reboot)
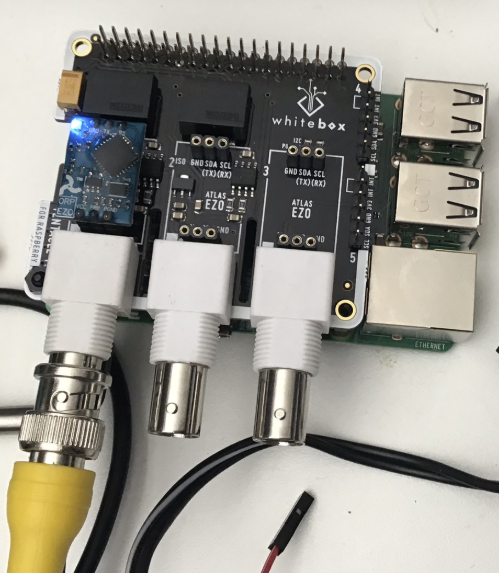
Step 4: Prepare the hardware
Make sure the Raspberry Pi is powered Off
Mount the Tentacle on the Raspberry Pi. Make use of the pcb standoffs for a better stability.
Make sure you plugged in the EZO Circuit, double check the orientation.
Power on the rasbperry Pi.
Make sure that the led on the EZO Circuit is blue. If not, power off the pi and check the EZO Circuit.
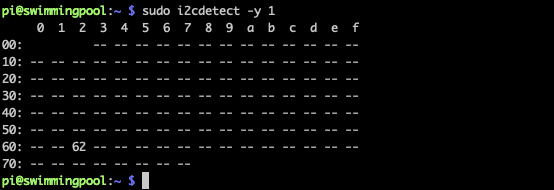
Test the I2C
sudo i2cdetect -y 1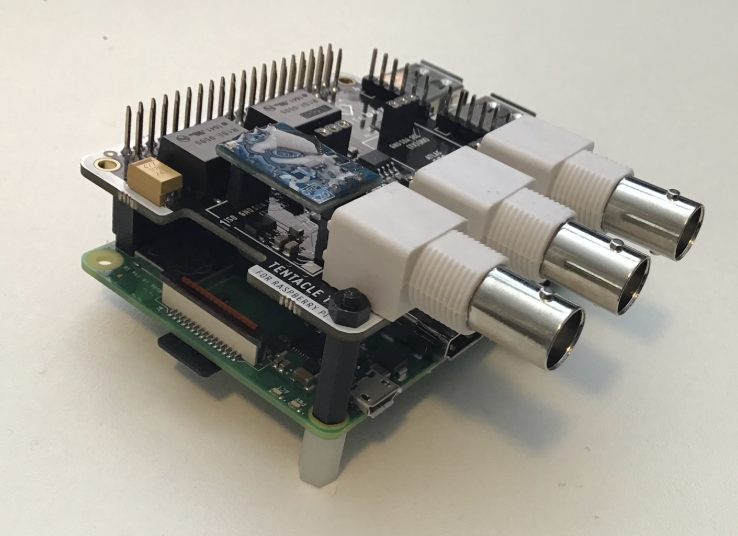
You should see something like this in a table
install requests
Step 5: Test the ORP Probe readings
Download the latest Atlas Scientific sample code.
cd ~/scripts
git clone https://github.com/AtlasScientific/Raspberry-Pi-sample-code.git
cd Raspberry-Pi-sample-code
sudo python i2.py
Here you can ‘play’ with the probe. Read the manual from Atlas Scientific for all the details. Type ‘r’ for a single reading.
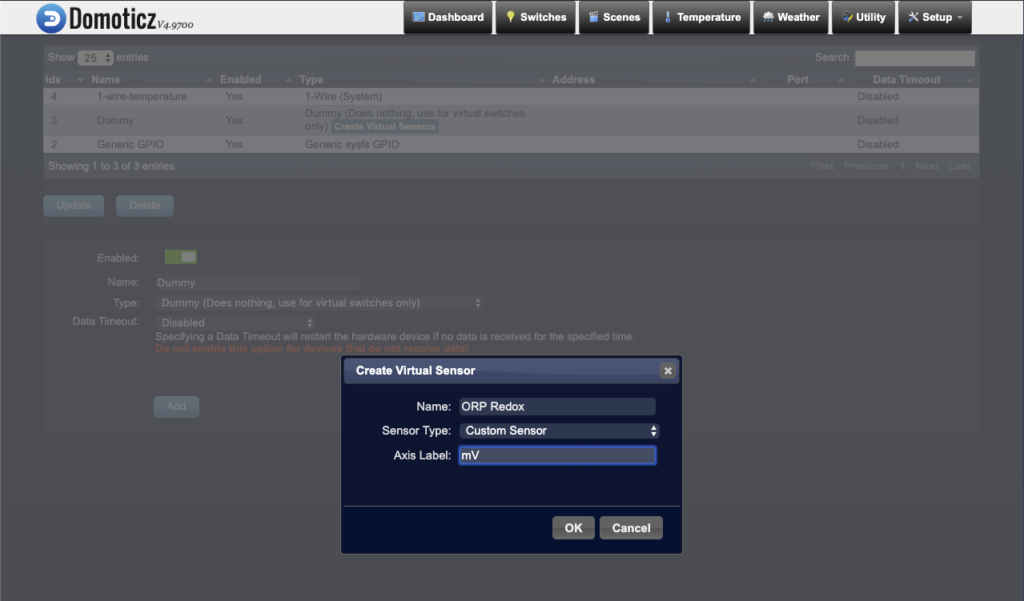
Step 6: Connect the Atlas Scientific ORP Probe to Domoticz
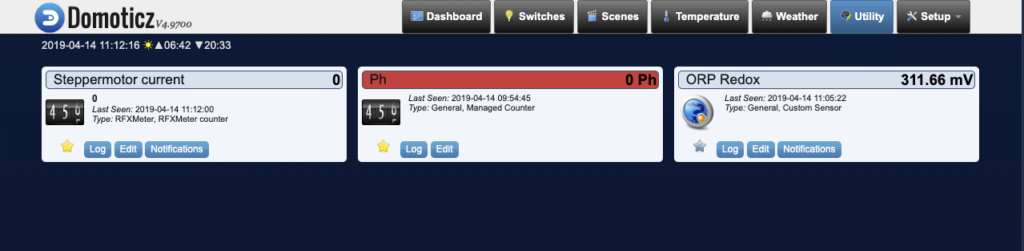
Add a dummy managed counter to Domoticz, via Setup -> Hardware -> Create Virtual Sensors. Give the virtual sensor the name: ‘ORP Redox’ of the Type ‘Custom Sensor’. For the Axis Label we use ‘mV’.
I modified the script of Atlas Scientific so it reads 7 times the ORP, throws the highest and lowers value away and send the average to Domoticz.
This scripts is beta, it works because the default I2C device is 98 (ORP).
Create a file ~/scripts/readOrp.py with the following code.
#!/usr/bin/python
import io # used to create file streams
from io import open
import fcntl # used to access I2C parameters like addresses
import time # used for sleep delay and timestamps
import string # helps parse strings
import requests
class AtlasI2C:
long_timeout = 1.5 # the timeout needed to query readings and calibrations
short_timeout = .5 # timeout for regular commands
default_bus = 1 # the default bus for I2C on the newer Raspberry Pis, certain older boards use bus 0
default_address = 98 # the default address for the sensor
current_addr = default_address
def __init__(self, address=default_address, bus=default_bus):
# open two file streams, one for reading and one for writing
# the specific I2C channel is selected with bus
# it is usually 1, except for older revisions where its 0
# wb and rb indicate binary read and write
self.file_read = io.open("/dev/i2c-"+str(bus), "rb", buffering=0)
self.file_write = io.open("/dev/i2c-"+str(bus), "wb", buffering=0)
# initializes I2C to either a user specified or default address
self.set_i2c_address(address)
def set_i2c_address(self, addr):
# set the I2C communications to the slave specified by the address
# The commands for I2C dev using the ioctl functions are specified in
# the i2c-dev.h file from i2c-tools
I2C_SLAVE = 0x703
fcntl.ioctl(self.file_read, I2C_SLAVE, addr)
fcntl.ioctl(self.file_write, I2C_SLAVE, addr)
self.current_addr = addr
def write(self, cmd):
# appends the null character and sends the string over I2C
cmd += "\00"
self.file_write.write(cmd.encode('latin-1'))
def read(self, num_of_bytes=31):
# reads a specified number of bytes from I2C, then parses and displays the result
res = self.file_read.read(num_of_bytes) # read from the board
if type(res[0]) is str: # if python2 read
response = [i for i in res if i != '\x00']
if ord(response[0]) == 1: # if the response isn't an error
# change MSB to 0 for all received characters except the first and get a list of characters
# NOTE: having to change the MSB to 0 is a glitch in the raspberry pi, and you shouldn't have to do this!
char_list = list(map(lambda x: chr(ord(x) & ~0x80), list(response[1:])))
return "Command succeeded " + ''.join(char_list) # convert the char list to a string and returns it
else:
return "Error " + str(ord(response[0]))
else: # if python3 read
if res[0] == 1:
# change MSB to 0 for all received characters except the first and get a list of characters
# NOTE: having to change the MSB to 0 is a glitch in the raspberry pi, and you shouldn't have to do this!
char_list = list(map(lambda x: chr(x & ~0x80), list(res[1:])))
return "Command succeeded " + ''.join(char_list) # convert the char list to a string and returns it
else:
return "Error " + str(res[0])
def query(self, string):
# write a command to the board, wait the correct timeout, and read the response
self.write(string)
# the read and calibration commands require a longer timeout
if((string.upper().startswith("R")) or
(string.upper().startswith("CAL"))):
time.sleep(self.long_timeout)
elif string.upper().startswith("SLEEP"):
return "sleep mode"
else:
time.sleep(self.short_timeout)
return self.read()
def close(self):
self.file_read.close()
self.file_write.close()
def list_i2c_devices(self):
prev_addr = self.current_addr # save the current address so we can restore it after
i2c_devices = []
for i in range (0,128):
try:
self.set_i2c_address(i)
self.read(1)
i2c_devices.append(i)
except IOError:
pass
self.set_i2c_address(prev_addr) # restore the address we were using
return i2c_devices
def main():
device = AtlasI2C() # creates the I2C port object, specify the address or bus if necessary
try:
print("Wake up EZO by getting the info")
print(device.query('i'))
except IOError:
print("do nothing")
time.sleep(1)
try:
orpResults = []
#Do five readings for the average
for x in range(0,7):
response = device.query('r')
print(response)
if (response.startswith("Command succeeded")) :
floatVal = float(response[18:])
if (floatVal > 0) :
orpResults.append(floatVal)
print("OK [" + str(floatVal) + "]")
time.sleep(.5)
#remove highest and lowest in lest
print("Remove highest and lowest value")
orpResults.remove(max(orpResults))
orpResults.remove(min(orpResults))
average = round(sum(orpResults) / float(len(orpResults)), 2)
print("Calculate average: " + str(average))
if (average > 0) :
print("Push value to domoticz")
#the idx is the devicenummer in domoticz
r = requests.get("http://localhost:8080/json.htm?type=command¶m=udevice&idx=21&svalue=" + str(average))
#put chip into sleepmodus
print(device.query('sleep'))
except IOError:
print("Query failed \n - Address may be invalid, use List_addr command to see available addresses")
if __name__ == '__main__':
main()Search for the requests.get. Here you see &idx=21. 21 is the number of the ORP device we created. Type here your device number. You can see all tje device number in de Device list (Setup -> Devices). Execute this script:
python readOrp.py

#If it complains about the requests import, install the python request module
sudo apt-get install python-requests
Now you see several readings and the push to Domoticz.
If you want every 15 minutes a new reading, add the script in crontab.
crontab -e

#add the following line at the bottom
*/15 * * * * /usr/bin/python /home/pi/scripts/readOrp.py
Save and close the crontab window by pressing Ctrl + x.
not work 🙁 My temperature sensor not send info to Domoticz
I change the id and Default address, but not work
Help me 🙁